- +91 95576 18775
- +91 85115 25161
- skengineering9557@gmail.com
How to Install Z-Type Bucket Elevator?
How to Install Z-Type Bucket Elevator?
The Z-type bucket elevators are commonly used in a broad range of industries including the food, agriculture, and manufacturing industries because of their feature of vertical transportation.
For professionals and business personnel installing Z-type bucket elevators, it is crucial to know how to install Z-type bucket elevators appropriately. That is why this guide will help you get through all the phases of the project from preparation to maintenance to achieve the perfect installation.
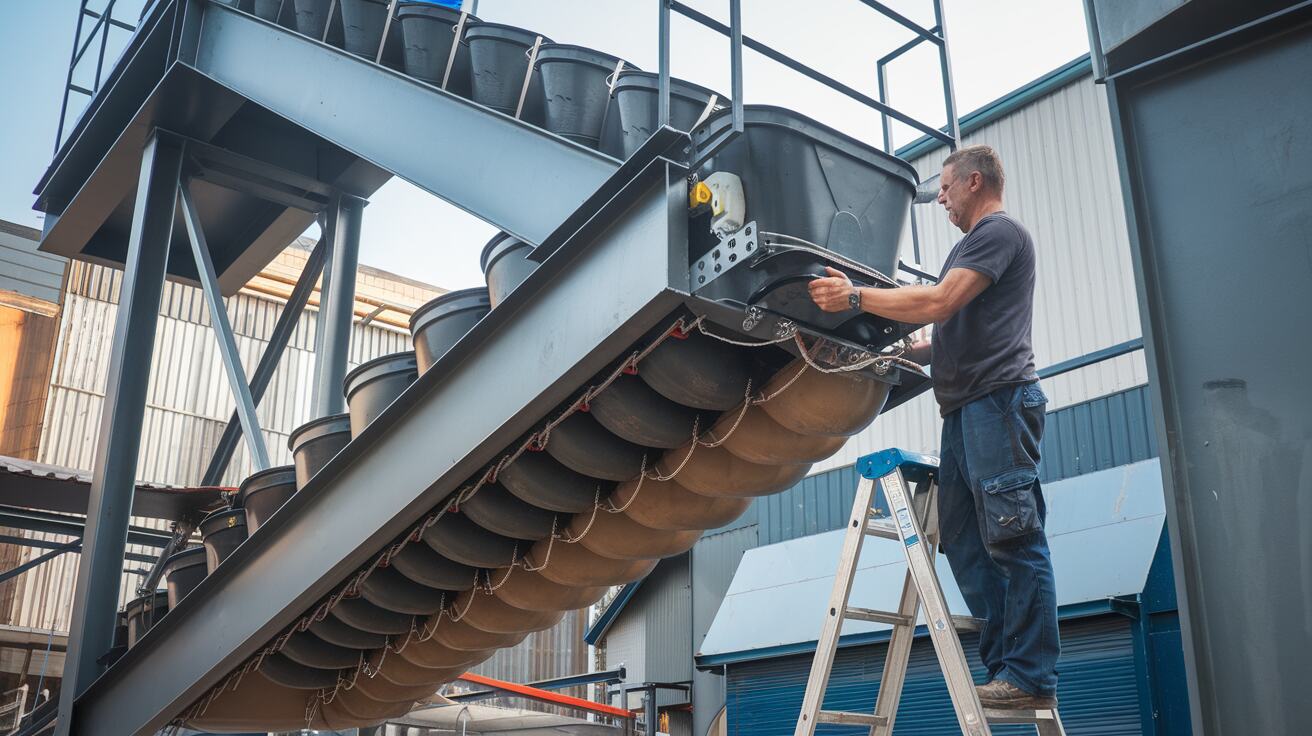
Overview of Z-Type Bucket Elevator
A Z-type bucket elevator simply refers to an elevator that transports bulk materials within a “Z” pattern – both horizontally and vertically. These include the buckets, chains or belts, drive units, and the casing of the whole machine.
These are extremely popular, mainly because of their maximum durability and flexibility, and there are many industries, for example, food processing or the production of seeds and powder, where gentle motion is crucial.
Key Components of a Z-Type Bucket Elevator
• Buckets: Holds and carries the materials.
• Chains or Belts: Lifting mechanism
• Drive Unit: A power source for the elevator's operation
• Casing: External covering of internal parts from external elements
Importance of Inspecting Components
• Perfect inspection will give assurance that the part is correctly working at a maximum level while in operation.
• Lack of proper setting or broken pieces may result in inefficiency or increased wear down to total breaking.
• Correct parts and assembly therefore ensure that these systems will always last and hence pre-installation checks are highly essential in a setup or some form of repair.
How to Install Z-Type Bucket Elevators? - Step-by-Step Installation Process
Step 1: Assembling the base frame• First of all, to know how to Install Z-type bucket Elevators it is necessary to fix the basic framework on the even ground.
• All bolts should be tightened properly making sure that the frame has good stability and a figment of adjustment.
Step 2: Installing the drive and tensioning units• Mount it based on the manufacturer’s recommendation in terms of where to mount the drive unit.
• Fix the tensioning unit and make sure that this one can be adjusted down the line for proper calibration.
Step 3: Mounting the casing and structural framework• End regarding the casing sections in the right manner.
• Screw the structural framework to the base frame and check the levelness by using levelers.
Step 4: Fixing the buckets and chains• Recommend the intervals upon which the buckets should be fixed to the chain or belt.
• Tighten all connections uniformly to ensure that the connections are extremely tensed up and uniform.
Step 5: Connecting electrical systems and control panels• Locate this control panel in an area that will enable you to access this easily.
• Join the electrical connections based on the circuits that were illustrated by the Z Type Bucket Elevator Manufacturers during the construction process.
Step 6: Testing alignment and tension• Grab the chain or belt with your hand and try rotating it to determine whether or not it rotates smoothly.
• Leverage for slip up or operational loss and tight for optimal performance.
How to ensure the system is properly aligned?
1. Check Component Alignment:First of all, one should overview the position of such components as buckets, chains, and drive units of the machine.
2. Adjusting the Drive Unit:Make sure the drive unit is intuitively aligned concerning the chain’s trajectory.
3. Use of Adjustment Mechanisms:There are ones that came with tensioners or take-up units that may be adjusted.
Adjusting bucket tension for optimal performance
• Check for Slack:With the system off, feel behind if the buckets have dropped or if there is slack in the chain.
• Adjust Tensioners:Loosen the buckle and pull by using the tensioners that have been incorporated within the device.
Common issues to look out for during testing
• Noise, or oscillations, which presage possible misalignment.
• Against the casing or other structural elements the buckets impact.
Common Installation Mistakes to Avoid
• Overlooking Alignment:It increases the amount of wear and tear, which decreases the efficiency of the machine and takes a toll on the accuracy of the alignment as well.
• Skipping Pre-Installation Checks:Lack of site preparation and component inspection can lead to time loss and or operational problems.
• Improper Fastening of Bolts and Screws:Make sure all the bolts and screws used are tightened to the correct standard as may be required by the manufacturer to avoid working loose.
Read More: What’s a Z Elevator Machine and How Does It Work?
Conclusion
Z Type Bucket Elevator Manufacturers can provide better advice on improving and maintaining the elevator system. It also increases productivity and impacts an organization positively in that the installation of the relevant gadget accelerates the work done and reduces the chance that the gadget will be unusable in the future.
Read More: How Do C Type Elevator Machines Handle Delicate Food Products Efficiently?